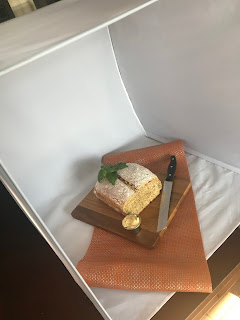
I wanted to quickly update you on how my photo day went today. So first off I decided to photograph a bread that my mom made. First, I started to take pictures with the cheap set up that you can see in photo A. After 20 minutes, my dad showed up with a professional set up that you can see in photo B.
 |
Photo B
|
 |
| Photo A |
I took a bunch of photos from different angles and I only chose a few that I might considered adding to the magazine. This pictures would be added in the table of contents, which I will talk more in depth in a next blog. But for the table of contents, I want it to have various pictures of different foods. After I chose the pictures I liked best, I edited them using a free online photo editor called, Fotor. For editing (which I will talk about more in a next blog), I read that one should sharpen the image, increase the brightness, saturation, temperature and highlights. For all the pictures, I did just that but not too much. Because if it is edited too much, it would look less appealing and more fake. The point is to enhance the picture a little bit to get that "professional" look.
 |
| Before |
Here are some examples:
 |
| Before |
 |
| After |
 |
| After |
Since this was my first time taking pictures of food in a professional level, it was hard for me to know what decorations looked good and how to make the picture fit that "magazine" quality. As you can see, the pictures above are very simple. I definitely need to get better at taking pictures and editing. Hopefully, the next pictures look much better. I will probably try to edit this pictures again and I will show you the picture again. But until next time, I will be researching editing techniques, working on my table of contents layout and stories, and trying to take more pictures.
Ciao,
SABRI
Citations:
(n.d.). Retrieved March 11, 2018, from https://www.fotor.com/app.html#/editor/basic
Jenny, M. (2016, February 05). 3 THINGS : food photography editing tips | with before & after pics.
Retrieved March 11, 2018, from http://jennymustard.com/3-things-food-photography-editing-tips-
with-before-after-pics/


Comments
Post a Comment